My first attempt at printing was met with utter failure. Not the hot, bubbling, melty plastic kind, but the cold, gear grinding, nothing's working kind. Here's what I learned...
Always Use Self-tightening Nuts
Unless the directions say otherwise, use nylocks. I have an Adrian's extruder, the larger gear's drive shaft is made of threaded rod, bearings, and a "brass insert". The brass insert has ribs around it so it can move the filament down to the extruder.
All these components are held together with m4 nuts. But, when your hot end chamber isn't hot enough, you end up jamming plastic filament into the hot end. The brass insert grinds away and eventually loosens the nuts on the threaded rod, making the whole drive shaft useless.

When I first started, I couldn't get nylock nuts down onto the threaded rod more than a few spins, it would have taken an hour to move the nuts into position with just pliers. Eventually, when you're building a RepRap, you realize that it's just a machine, and that you'll never find specific step by step instructions, and that you need to do whatever it takes to get this sucker built. So, this is how to get nylock nuts onto the threaded rod.
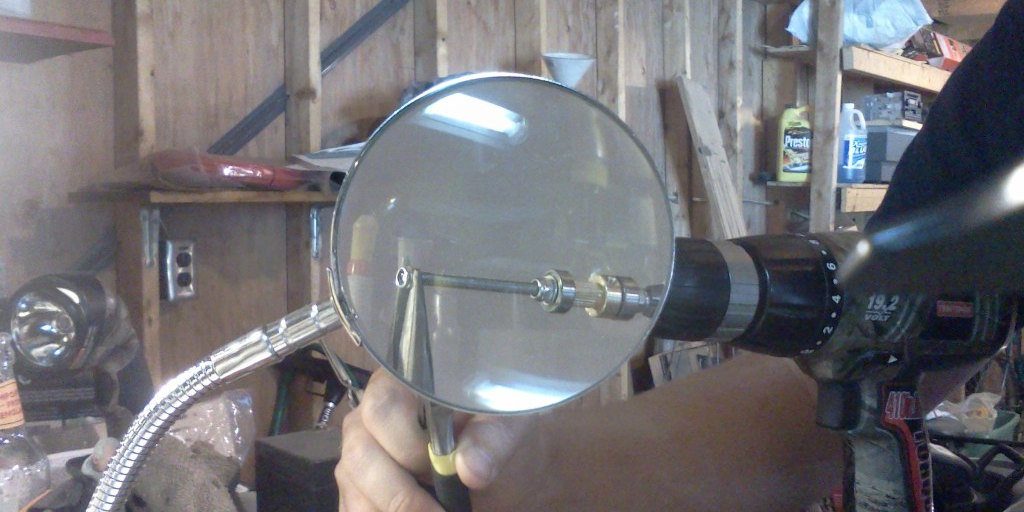
What you want to do when you install nylocks that need to travel a long way down is put the rod or screw into a drill motor (a.k.a. screw gun) and grip the nylock nut with some pliers or needle nose pliers. Make sure your motor is set to low and that the torque setting is at its lowest setting. Slowly turn the drill on and the nylock will flow down the rod to wherever you want. Simple, huh?
Check Your Thermistors
Before you start building, check your thermistor readings at ambient room temperature. If you're not familiar with Celsius off the top of your head, do the calculation to Fahrenheit. Your thermistor settings could be off. In the Sprinter firmware, you can choose between 3 different thermistor settings.
They way a glass bead thermistor works is that you have two leads encased in - well - a glass bead. As the temperature of the glass bead increases, the resistance between the two leads decreases, and the micro-controller can translate the voltage reading into a temperature, but it needs a translation table. You can choose between 100k, 200k, and "Mendel Parts" thermistor settings. If you have the wrong translation table your build chamber will be too cold or too hot and your plastic won't move smoothly, destroying - or damaging - your extruder.
File your Wing Nut
Creating the extruder was one of the first tasks I attempted. This is because the RepRap wiki lists it as one of the first step. I completely disagree that the extruder should be attempted first. If you're constructing a "Sells" Mendel (the unnamed, original variant) the order you should do is:
- Z-Axis
- Frame
- Y-Axis
- X-Axis
- Extruder
This will give you a better sense of how the entire unit is constructed, while also giving you the easiest pieces to construct first, leaving the most complex for last.
So, as one of my very first steps I tried to create the drive shaft for the extruder. I had no idea how far away from the "brass insert" the gear should be, so I positioned everything with regular nuts instead of nylocks. I thought it would be come apparent later how far away to put the gear (it doesn't). When attaching the wing nut to the extruder gear, the wiki says to file the inside of the nut down, but my nut was too thick to fit in the plastic gears slots. Instead of filing the nut down I tried to file the inside of the gear slots to make them bigger. This was a mistake.

The wings on a wing nut are not precisely manufactured, nobody returns a wing nut because the fins were 0.1 mm too large. So, filing this imprecise part makes the most sense. But, I didn't have a vice like depicted in the wiki. Well, after my entire extruder came apart after my first print I decided to make the wing nut fit on the gear way better than my first attempt.
If you don't have a vice screw it on to a spare m4 screw to use as a handle. Two opposing bolts will keep the wing nut from spinning while you're filing it.
Hollow out Tight Holes
When you have a hole that seems too tight, you might be tempted to drill out the hole with a drill bit. If you have SAE drill bits, do not even try to hollow out a metric hole with these. Your drill bit will wobble when the drill is on high carve out the hole even larger than you need.

The best way I've found to drill out a hole in a plastic part is to use a screw of the same diameter of the hole. Put your screw in the drill and set it to low. Drill the screw into the piece and off again a few times. Now try to pull the pieces out as your drilling it on, and try to push the piece down the screw when your drill is in reverse. This should use the screw threads to grind out the hole to the perfect width. Obviously, if your hole has plastic inside, you'll need to drill with a regular drill bit, but if the hole is just a tad too small, a screw is the safer method.